Hi Friend,
In this article we will look into a more obvious issue with SharePoint Designer Workflows, i.e. moving SPD workflows from one list to another within same or a different site.
This article will explain the steps on how to automate the Workflow movements from one location to another.
In order to showcase the scenario, we need to set up the prerequisites and in the next few steps we will work on the same.
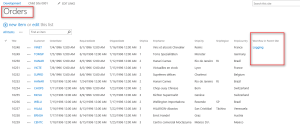
We are having a list by the name “Orders” in the Parent Site as shown below:
We will create a workflow in Parent Site [that will be copied to the child site later on], let’s call it “Workflow on Orders in Parent Site” and get it associated with “Orders” List as shown in the steps below:
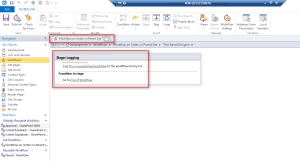
This is quite a simple Workflow with one step performing Logging Operation.
Once this Workflow Definition is Created and Published, we can get the Workflow ID as shown in the Article 1 of this series.

Here we are all done with configuration on Parent Site.
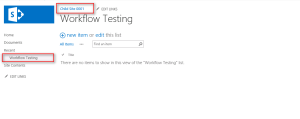
Now lets move on to the child site, where we have got another List by the name “Workflow Testing” as shown below:
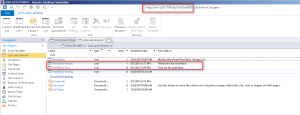
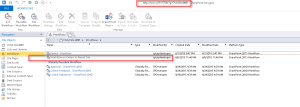
Browse the child site in SharePoint Designer and look for the List ID for “Workflow Testing” List as shown below:
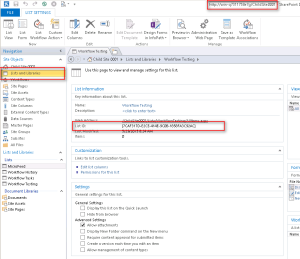
Now look for “Workflow History” and “Workflow Tasks” Lists and verify if they are present and if not we need to create them beforehand.
With this we are all done with setting up the prerequisites for this demo.
Now let take a deep dive in the code base to understand its composition-
1.Specify the Workflow ID which needs to be copied from Parent to Child Site
2.Specify the List ID to which this Workflow needs to be associated in the Child Site.

3.Instantiate Object of Workflow Service Manager Object using Context of Child Site
4.Instantiate Object of Workflow History List in Child Site
5.Instantiate Object of Workflow Tasks List in Child Site

6.Set Workflow Details before copying it to Child Site

7.Setting Workflow Properties

8.Finally call “publishSubscriptionForList” function of Workflow Subscription Service to get the workflow published on to the target list.

Once this code gets execute without error, sure enough we will get the workflow created in the child site and associated with the specified list.
Following are the steps that we can take to verify if the Workflow is copied and associated as expected on the Child Site:
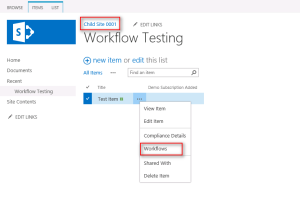
1.Browse the Child Site and navigate to the Workflows section and see if we get “Workflow on Orders in Parent Site” workflow created
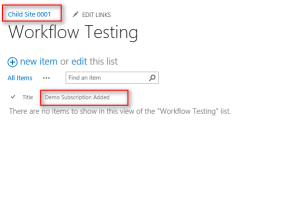
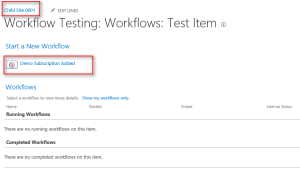
2.Browse the Child Site in Browser and navigate to the “Workflow Testing”, see if Workflow Status Column with the Name “Demo Subscription Added” is created.
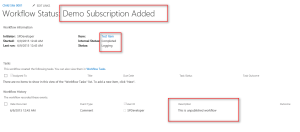
3.Start the workflow on any Item in the list and see if it is working as expected.
Hope this article provides you a brief idea on how can we make use of Workflow Subscription Services to add the Workflow Association to a specific list.
In this article we will look into a more obvious issue with SharePoint Designer Workflows, i.e. moving SPD workflows from one list to another within same or a different site.
This article will explain the steps on how to automate the Workflow movements from one location to another.
In order to showcase the scenario, we need to set up the prerequisites and in the next few steps we will work on the same.
We are having a list by the name “Orders” in the Parent Site as shown below:

We will create a workflow in Parent Site [that will be copied to the child site later on], let’s call it “Workflow on Orders in Parent Site” and get it associated with “Orders” List as shown in the steps below:

This is quite a simple Workflow with one step performing Logging Operation.
Once this Workflow Definition is Created and Published, we can get the Workflow ID as shown in the Article 1 of this series.
Here we are all done with configuration on Parent Site.
Now lets move on to the child site, where we have got another List by the name “Workflow Testing” as shown below:

Browse the child site in SharePoint Designer and look for the List ID for “Workflow Testing” List as shown below:

Now look for “Workflow History” and “Workflow Tasks” Lists and verify if they are present and if not we need to create them beforehand.

With this we are all done with setting up the prerequisites for this demo.
Now let take a deep dive in the code base to understand its composition-
1.Specify the Workflow ID which needs to be copied from Parent to Child Site
2.Specify the List ID to which this Workflow needs to be associated in the Child Site.
3.Instantiate Object of Workflow Service Manager Object using Context of Child Site
4.Instantiate Object of Workflow History List in Child Site
5.Instantiate Object of Workflow Tasks List in Child Site
6.Set Workflow Details before copying it to Child Site
- Set Workflow Name
- Specify if the workflow is enabled
- Specify the Workflow Definition ID
- Specify the Workflow Status Column Name
- Specify the Target List ID
- Specify supported Event Types
7.Setting Workflow Properties
- Setting Workflow List IDs
- Task List
- History List
- We need to Set “FormData” property to blank if we don’t want to set any specific value, but must set this property.
8.Finally call “publishSubscriptionForList” function of Workflow Subscription Service to get the workflow published on to the target list.
Once this code gets execute without error, sure enough we will get the workflow created in the child site and associated with the specified list.
Following are the steps that we can take to verify if the Workflow is copied and associated as expected on the Child Site:
1.Browse the Child Site and navigate to the Workflows section and see if we get “Workflow on Orders in Parent Site” workflow created

2.Browse the Child Site in Browser and navigate to the “Workflow Testing”, see if Workflow Status Column with the Name “Demo Subscription Added” is created.

3.Start the workflow on any Item in the list and see if it is working as expected.


Hope this article provides you a brief idea on how can we make use of Workflow Subscription Services to add the Workflow Association to a specific list.
No comments:
Post a Comment