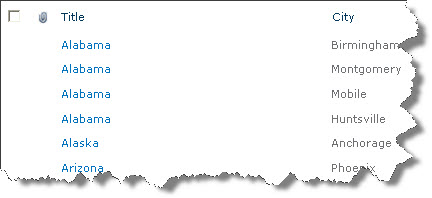
Step 1: Create the list of states and cities by creating a custom list. Let’s call it States and in addition to the default column called, "Title", let’s add City as
a new text column. Then let’s populate the list with some States and
Cities. Below is a screen shot that illustrates the new list. If you are
following along, for your convenience I have included an Excel file
with some States and Cities:
 Step 2: So now that you have created the States
list, let’s create a new list in which we will give the user a set of
cascading drop-down lists. Go ahead and create a custom list and call it
List of Accounts, or anything you like. Once you have
created the list, you will see that you can launch the InfoPath designer
by clicking on the "Customize Form" icon depicted in the screenshot
below (marked with a 2 in hand written red ink)
 Step 3: Once InfoPath designer launches, add a Receive connection to the States SharePoint list.
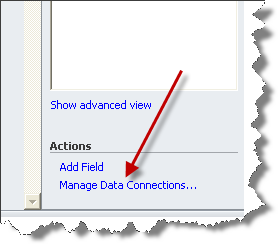 Click on Add..
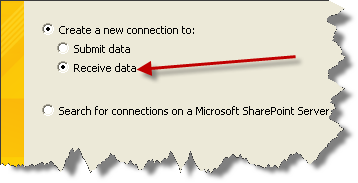
 Click on Receive data
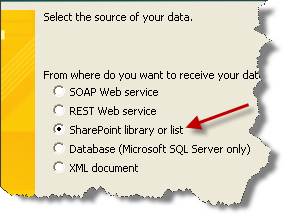
 Click on SharePoint Library or list
 Provide the URL of States List
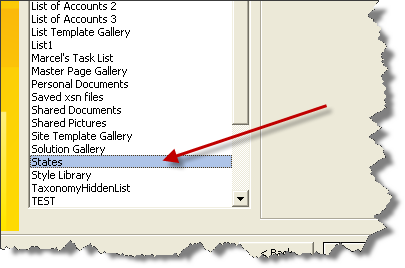
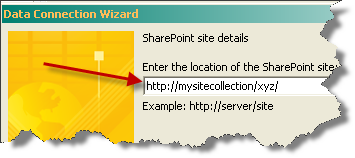 Pick the States list
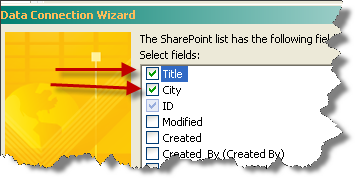
 Check off Title and City
 Then keep going with Next, until you get to Finish
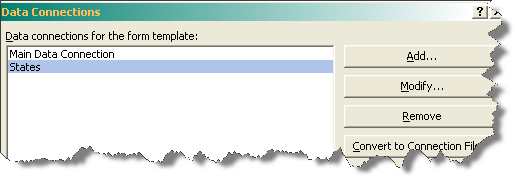 Now that you have the connection we will create two drop-down lists that leverage this connection.
Step 4: Create two drop-down lists boxes and call the first one State and the other one City. By default InfoPath will call them field 1 and field 2. I renamed them to State and City.
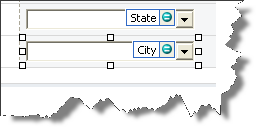 NOTE: When you add the drop down list boxes, InfoPath will ask you
whether you want to add the choices manually or whether you want to look
them up in a list. Pick the Manual Choices. We will set these lists up in a moment.
Step 5: In step 6 we will ensure that the City drop-down lists will work in concert with the State drop-down. In this step we will make sure that the State drop-down gets the list of States.
Right click on the States drop-down, then click on the Drop-Down List Box Properties
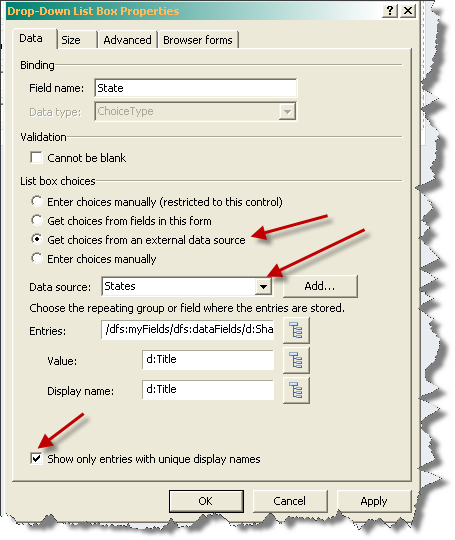
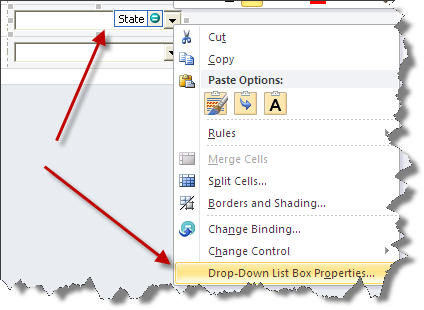 On the next dialog, make sure your choices look like the ones I have
highlighted below. Note that I have checked off the “Show only entries
with unique display names.”
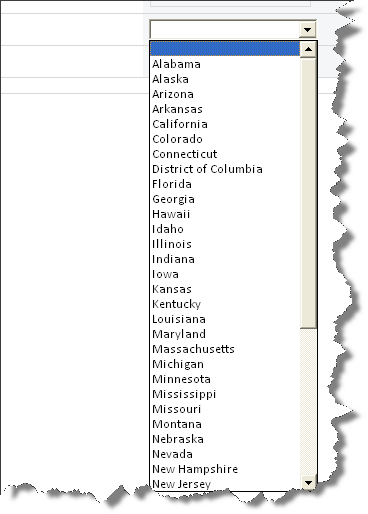
 At this point you can preview the form in InfoPath and see that the first list box is fully operational:
 Step 6: We are now ready to setup the City drop-down. Bring up the properties dialog for the City drop-down.
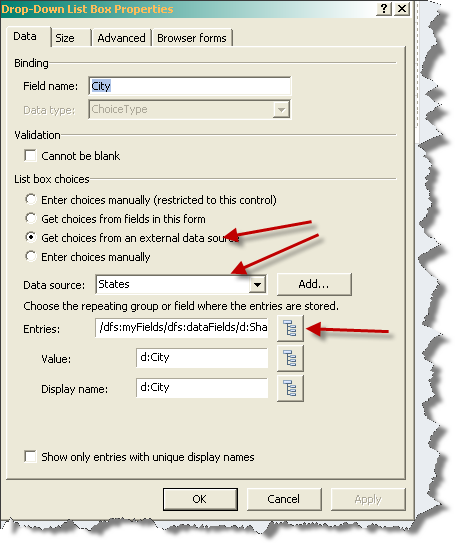 We will need to make a few adjustments.
Step 6a) For the List Box choices, pick Get choices from an external data source.
Step 6b) For the Data Source, pick States.
Step 6c) Click on the xPath ( ) icon to the right of Entries.
Step 6d) Open the dataFields folder and select the item in the folder. Then click on Filter Data…
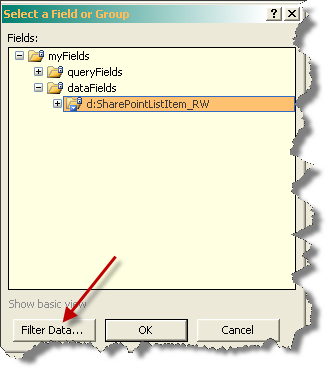 Step 6e) Click on Add
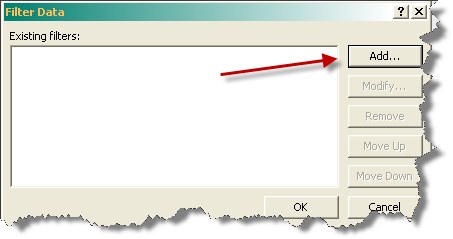 Step 6f) make sure Title is selected on the left, then “is equal to”, then pull down the drop-down on the right
 Step 6g) Pick Select a field or group…
 Step 6h) On the top, change the drop down from States (Secondary) to Main
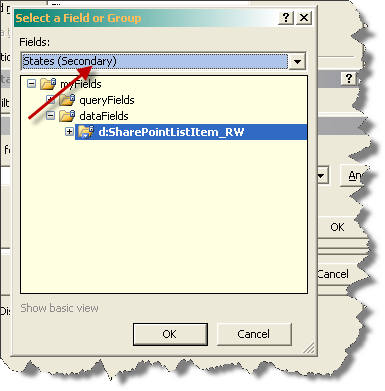
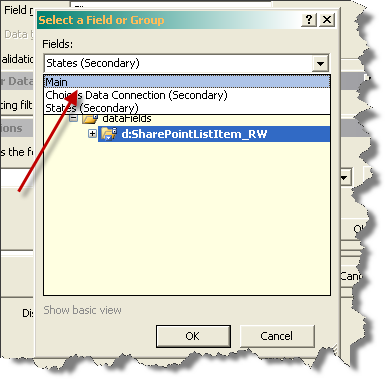 Step 6i) Pick State
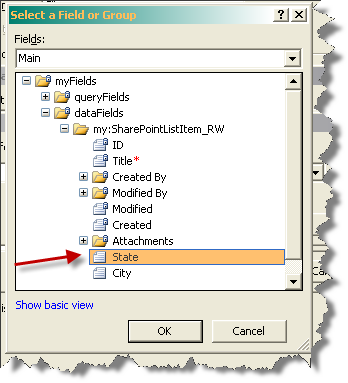 Click OK, until you are back at the beginning. Now you can preview the form and it works almost perfectly!
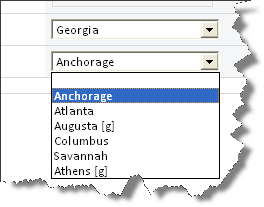 There is one tiny issue! The city drop down does not clear itself.
Therefore if you pick another state, the old city will stay the same as
the one you had picked in the earlier pick of the city.
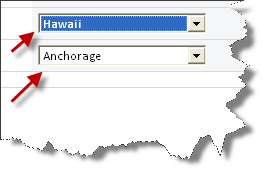 We must add a rule to clear the City. This leads us to step 7
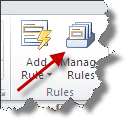
Step 7a) Select the City drop-down, and click on the Mange Rules icon in the Home Ribbon
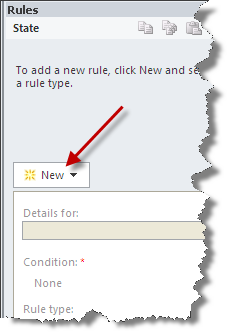
 Step 7b) Click on the New on the right side
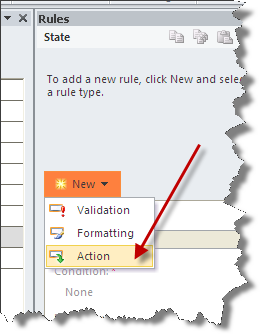
 Step 7c) Pick Action
 Step 7d) Click on Set a field’s value
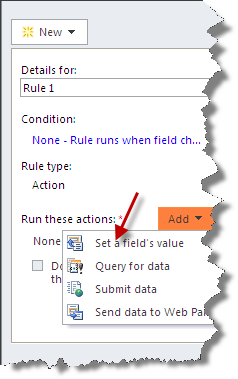 Step 7e) Set a field’s value, and then pick City for the field. Leave the Value blank.
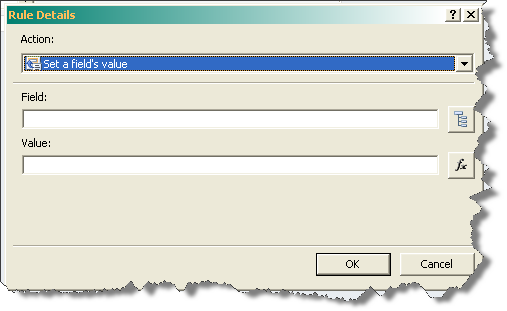
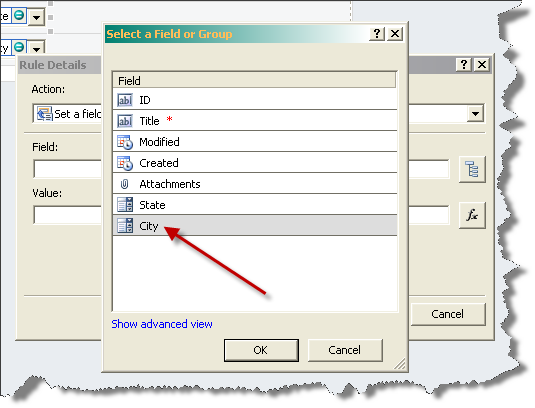
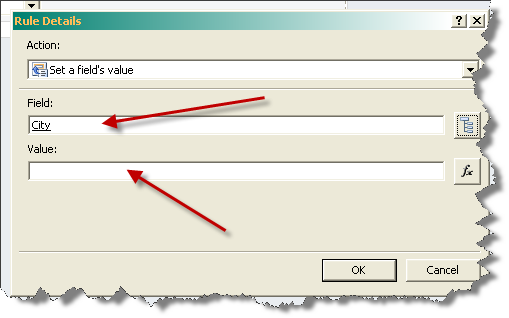 Hit OK , and you are done!
You should now have a fully functioning cascading drop-down set of lists.


- Click on Manage Data Connections…
- Click on Add..
- Click on Receive data then on Next
- Click on SharePoint Library or list then on Next
- Provide the URL of States List then on Next
- Pick the States list then on Next
- Check off Title and City the click on Next
- Then keep going with Next, until you get to Finish.


Step 4: Create two drop-down lists boxes and call the first one State and the other one City. By default InfoPath will call them field 1 and field 2. I renamed them to State and City.

Step 5: In step 6 we will ensure that the City drop-down lists will work in concert with the State drop-down. In this step we will make sure that the State drop-down gets the list of States.
Right click on the States drop-down, then click on the Drop-Down List Box Properties


Step 6a) For the List Box choices, pick Get choices from an external data source.
Step 6b) For the Data Source, pick States.
Step 6c) Click on the xPath (
 ) icon to the right of Entries.
Step 6d) Open the dataFields folder and select the item in the folder. Then click on Filter Data…


Step 7a) Select the City drop-down, and click on the Mange Rules icon in the Home Ribbon


You should now have a fully functioning cascading drop-down set of lists.